A package in WHM is a named bundle of resource limits (disk space, bandwidth, email accounts, databases, etc.) that you assign to cPanel accounts when you create them. One package per hosting "plan" you offer your clients. This article covers creating and managing them.
Why use packages?
You could create every cPanel account with manually-entered limits, but that's tedious and error-prone. Packages let you:
- Standardize plans: every "Starter" client gets the same quotas. No accidental inconsistency.
- Bulk-modify: change a package's limits and apply the new values to all accounts on that package at once.
- Match your billing: if you sell "Basic / Standard / Premium" plans to clients, mirror them 1:1 as packages in WHM so each account is clearly tagged.
Create a new package
- Log in to WHM (see How do I log in to WHM?).
- In the left sidebar, expand Packages and click Add a Package. Or use the Search box at the top and type "add package".
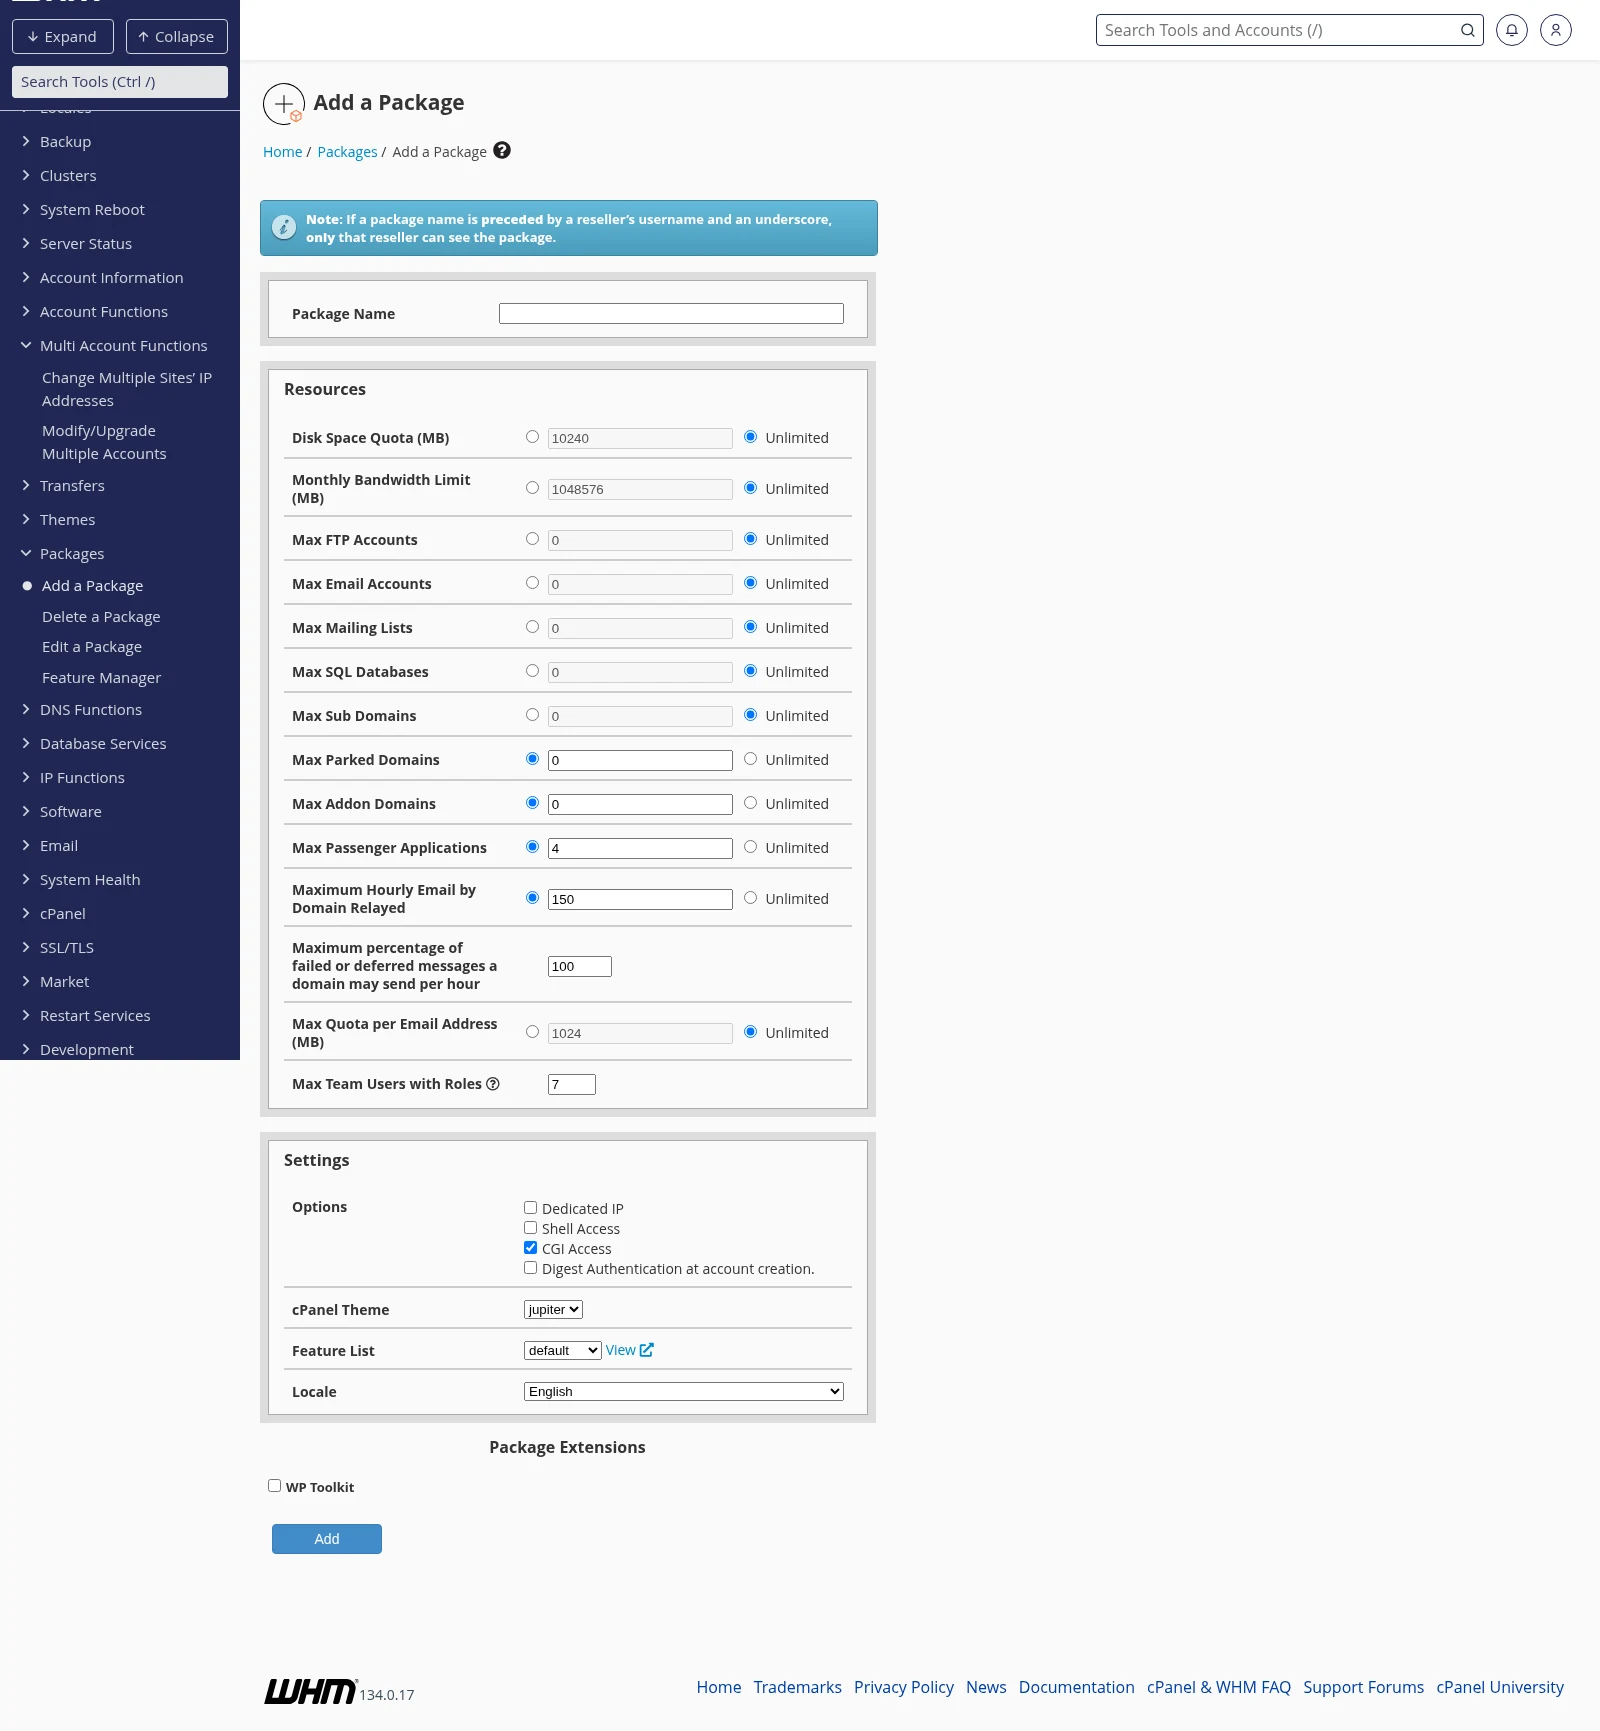
- Enter a Package Name. Short and clear is best (e.g.
basic,pro,wp_starter). This name is what you pick from the dropdown when you create a cPanel account. - Set the Resources. Each limit has an Unlimited radio button — select it to remove that cap. Common choices:
- Disk Space Quota (MB): enter the allowed disk, or select Unlimited.
- Monthly Bandwidth Limit (MB): traffic cap per billing month.
- Max FTP Accounts / Max Email Accounts / Max SQL Databases: how many sub-items the client can create.
- Max Addon Domains / Max Parked Domains / Max Sub Domains: how many extra domains/subdomains the client can host under one cPanel account.
- Maximum Hourly Email by Domain Relayed: anti-spam cap. Our servers already enforce sensible defaults here — don't set it too high.
- Configure Settings:
- Shell Access: leave unchecked unless the client specifically needs SSH. Turning it on for all your clients is a security risk; enable it per-account via Modify an Account when needed.
- CGI Access: leave checked.
- cPanel Theme: leave
jupiter. - Feature List: leave
defaultunless you've built a custom feature list.
- Click Add at the bottom.
The package is now available in the dropdown when you create a new cPanel account.
Editing an existing package
- In WHM, open Packages → Edit a Package.
- Select the package you want to change, click Edit.
- Change the limits. When you save, WHM asks whether to apply the new limits to existing accounts on this package, or only to new accounts going forward.
Use "apply to existing accounts" when you're bumping quotas (every client on the package gets more disk, good). Use "new accounts only" when you're tightening limits on newly-sold accounts without disrupting existing ones.
Deleting a package
Open Packages → Delete a Package, select the package, click Delete. If any accounts currently use the package, WHM will warn you — move those accounts to a different package via Upgrade/Downgrade an Account first.
Package name conventions
By default, packages you create are visible to you only — they're automatically prefixed with your reseller username (e.g. youruser_basic). This is helpful: it prevents name clashes with other resellers' packages on the same server.
If you log in as root (e.g. on your own VPS or dedicated server), you can create "extensions" accessible to multiple resellers — but on a standard reseller plan, every package is your own.
Matching packages to resources
A few suggestions when sizing your packages. These are starting points — adjust based on what your clients actually do:
| Plan | Disk | Bandwidth | Databases | Email accounts | Addon domains |
|---|---|---|---|---|---|
| Starter | 5 GB | 50 GB | 5 | 10 | 0 |
| Basic | 25 GB | Unlimited | Unlimited | Unlimited | 5 |
| Pro | 100 GB | Unlimited | Unlimited | Unlimited | Unlimited |
Related articles
Still stuck? Open a support ticket


