Your iPhone, iPad, and Mac all use Apple's built-in Mail app, which connects to CanSpace via standard IMAP and SMTP. This article covers both the one-tap auto-config option (available only for iPhone/iPad) and the manual setup for every Apple device.
Fastest path (iPhone / iPad): cPanel → Email Accounts → Connect Devices → download the configuration profile for iOS for iPhone/iPad/iPod and MacOS Mail.app — it installs every setting automatically.
Before you start
- You'll need the mailbox password — not your cPanel password. If you don't remember it, reset it in cPanel first: How do I change my email password?
- You'll need your server hostname (e.g.
eos.canspace.ca). Get it from cPanel's Connect Devices page. - The iOS/macOS configuration profile method handles iPhone, iPad, and Mac in one download.
Option 1 — One-tap setup with cPanel's config profile (easiest)
cPanel generates a signed configuration profile (.mobileconfig) that installs the account on iPhone, iPad, and Mac with zero manual entry.
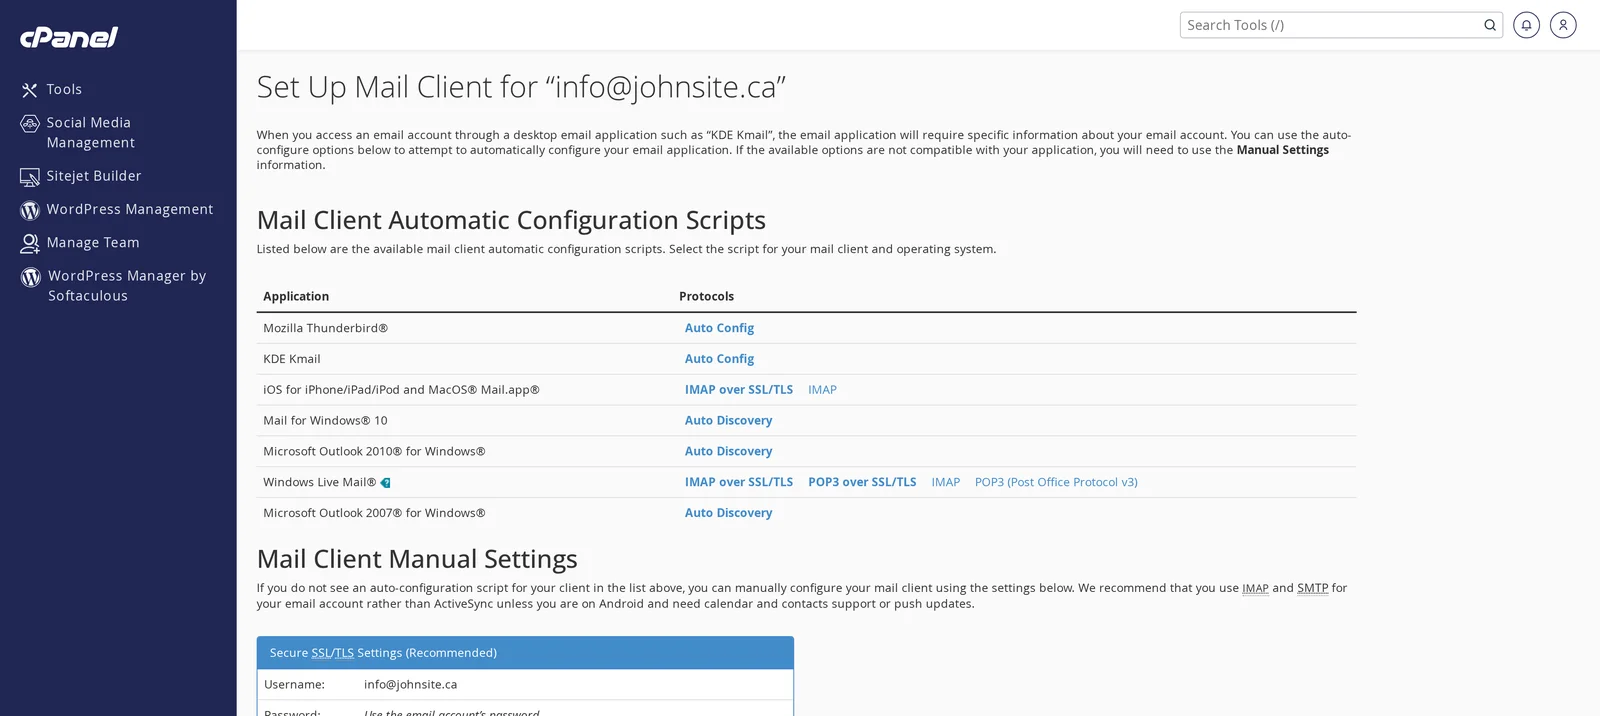
- On the device you want to set up, open https://www.canspace.ca/webmail and log in with your email address and password — or log in to cPanel on a computer and open Email Accounts → Connect Devices for the mailbox.
- Find the iOS for iPhone/iPad/iPod and MacOS Mail.app entry. Tap the Download Profile link.
- iOS: Settings opens showing "Profile Downloaded". Open Settings → General → VPN & Device Management → CanSpace email → Install. Enter your device passcode, then tap Install again to confirm. Enter the mailbox password when prompted.
- macOS: the profile downloads to System Settings. Open System Settings → Privacy & Security → Profiles, double-click the CanSpace email profile, and click Install.
That's it. Open the Mail app and your account is set up with IMAP, SMTP, and SSL all configured correctly.
Option 2 — Manual setup on iPhone / iPad
Use this if you'd rather not install a configuration profile, or the profile method didn't work for some reason.
- Open Settings → Mail → Accounts → Add Account → Other → Add Mail Account.
- Enter your name, full email address, password, and a description. Tap Next.
- Make sure the IMAP tab is selected (not POP).
- Fill in the Incoming Mail Server and Outgoing Mail Server sections with values from cPanel's Connect Devices page:
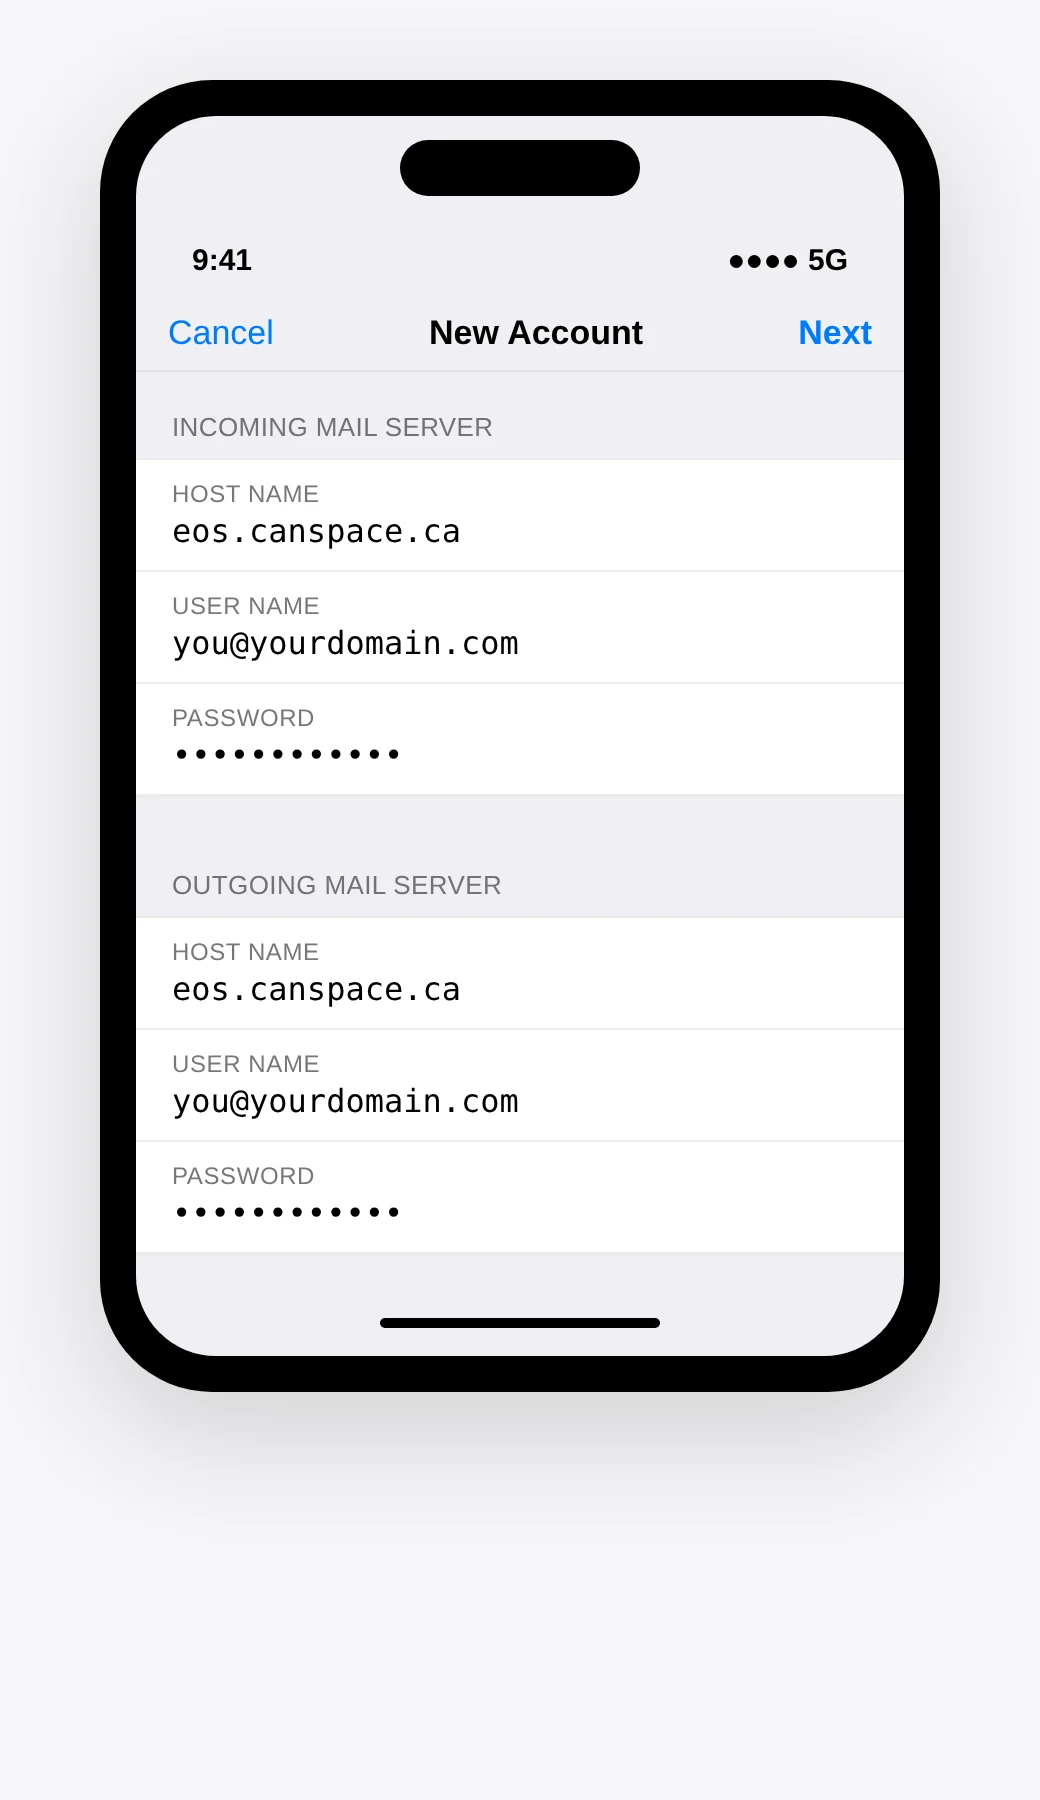
Server settings
| Setting | Incoming (IMAP) | Outgoing (SMTP) |
|---|---|---|
| Host Name | Your server hostname from Connect Devices (e.g. eos.canspace.ca) | |
| User Name | Your full email address (not just the part before the @) | |
| Password | Your mailbox password | |
- Tap Next. iOS will verify the account and, on success, add it to Mail.
iOS's setup screen doesn't ask for ports explicitly — it uses the standard SSL IMAP (993) and SSL SMTP (465) ports automatically. If you need to change the ports after the fact, open Settings → Mail → Accounts → [your account] → Account → Advanced.
Option 3 — Manual setup on Mac (Apple Mail)
- Open Mail. From the menu bar, choose Mail → Add Account.
- Select Other Mail Account... and click Continue.
- Enter your name, email address, and password. Click Sign In.
- macOS will try to auto-detect the settings. When it fails (it usually does on shared hosting), it asks for the incoming and outgoing mail servers. Enter your server hostname from cPanel's Connect Devices page. Use the same values for both incoming and outgoing.
- Set Account Type to IMAP. Click Sign In.
- Choose what to sync (Mail is usually the only thing you want) and click Done.
IMAP or POP — which should I use?
- IMAP (recommended): messages live on the server. Read or delete on one device, and the change is reflected everywhere. This is what you want for a phone + laptop + tablet setup.
- POP: messages are downloaded to one device and (usually) deleted from the server. Only useful if you want email on a single computer, and you want it all offline.
Common issues
- "Unable to verify account name or password" — the username must be your full email address, not just the part before the
@. Also confirm the password is current. - "Cannot Connect Using SSL" — tap Yes / Continue when prompted. This usually happens on the first setup while iOS verifies the certificate chain.
- "Verification failed" / endless loop — usually a typo in the hostname. Use the server hostname from cPanel's Connect Devices page (e.g.
eos.canspace.ca), notmail.yourdomain.com. - Sending fails after a while / SMTP prompts for password — open Settings → Mail → Accounts → [your account] → Account → SMTP → Primary Server, confirm Use SSL: On and Authentication: Password. Enter the password again if needed.
- Profile won't install — the profile is valid for 10 minutes after generation. If it's been a while, regenerate it from cPanel's Connect Devices page.
- Mail not receiving new messages until I open the app — iOS aggressively saves battery by delaying Fetch on IMAP accounts. Enable Settings → Mail → Accounts → Fetch New Data → Push for more immediate delivery (our server supports IMAP IDLE).
Related articles
- How do I create a new email account?
- How do I change my email password?
- How do I access my Webmail account?
- Email troubleshooting checklist
Still stuck? Open a support ticket


